Modern production processes have to meet ever higher quality requirements. Accordingly, the demands on the measuring technology used to determine the quality of the products are also increasing. This also applies to the measurement of surface roughness, such as the surface of rolls used in the milling industry.
The corresponding measurement devices must meet ever higher demands on accuracy and also be as versatile as possible. In addition, end users of measuring instruments are increasingly demanding special solutions for automated, process-accompanying quality control systems.
Wear equals loss
In the milling industry, the condition of the surfaces of the smooth and corrugated rolls is of decisive importance for the profitability of a mill. In modern mills, the roller mills, as the central production unit, run practically around the clock.
Since the grinding process is basically purely mechanical – coarse becomes fine by grinding – even modern rollers made of special alloys are subject to a certain amount of wear. Experienced millers know this, and numerous measurements and studies by mill manufacturers prove that the degree of wear of the rollers has a direct influence on the quality of the products, the yield, the energy consumption, on moisture losses and also on the stability of the grinding process.
The bottom line is that the higher the degree of wear, the higher the losses – in tonnes and dollars.
Various control options
These correlations explain the importance of regularly checking the condition of all smooth and corrugated rolls “working” in a mill. These checks can be carried out in various ways.
The simplest, but also rather inaccurate, is the visual inspection, where the experienced miller uses a dome to inspect the condition of the rollers. A second possibility is the analysis of the products in the laboratory. This mainly involves determining the particle sizes, moisture loss and/or ash content of the intermediate and end products.
Finally, monitoring energy consumption and yield can provide indications of roll wear. The most accurate way to determine roll wear is to measure the surface condition.
Service station or on site?
The service stations operated by a number of globally active suppliers of milling systems are equipped for such measurements of the surface condition of the grinding rolls. However, this means that the rolls must be removed, replaced by replacement rolls and transported to the service station for inspection and any necessary machining.
The whole procedure is very time consuming and expensive. The ideal solution is to measure “on site.” However, for reliable measurements in the mill, good spatial, hygienic and bright conditions must be available.
For the measurement itself, the various suppliers present different measuring equipment. There are two basic types of equipment. One works optically, the other measures tactilely (by touching).
Optical or tactile?
Optical measurements are performed with no physical contact, typically with light or laser. In principle, the reflection of the light/laser by the surface and thus its condition is measured. But this already shows the limitations. The surfaces must be very clean and there must be no disturbing light sources.
At best, even anti-reflection pastes must be applied. In tactile (contact measurement), a standardized diamond tip is pulled over the surface to determine the surface condition. Tactile devices are therefore “all-rounders.”
In the case of smooth rollers, the surface is scanned by a diamond stylus and the Ra-value (roughness value) is determined. With corrugated rolls, the contours are measured with a needle stylus.
Optical measurement only offers advantages where the surfaces are very sensitive. These can be mirrored or polished surfaces. Soft materials also can be measured better without contact. For the surface measurement of rollers, tactile measuring devices are advantageous.
Advantages of tactile measurement
The advantages of tactile measurement are mainly in its simplicity. The application is not complicated: Simply place the stylus, start the measurement and read the result.
For measurement, either so-called diamond stylus or needle stylus are used. They measure according to different principles. With diamond stylus, a skid is pulled over the workpiece, which usually surrounds the probe tip at the side. The recorded signal thus has the surface of the skid in the immediate vicinity of the probe tip as a reference. Macroscopic waviness or angular deviations of the surface are largely suppressed. The recorded signal describes the microprofile.
In contrast to this, with the free stylus, only the probe tip is in contact with the workpiece, so that all geometric features of the test piece, such as waviness or angle errors to the reference plane, are represented in the measurement signal.
The rollDetect system
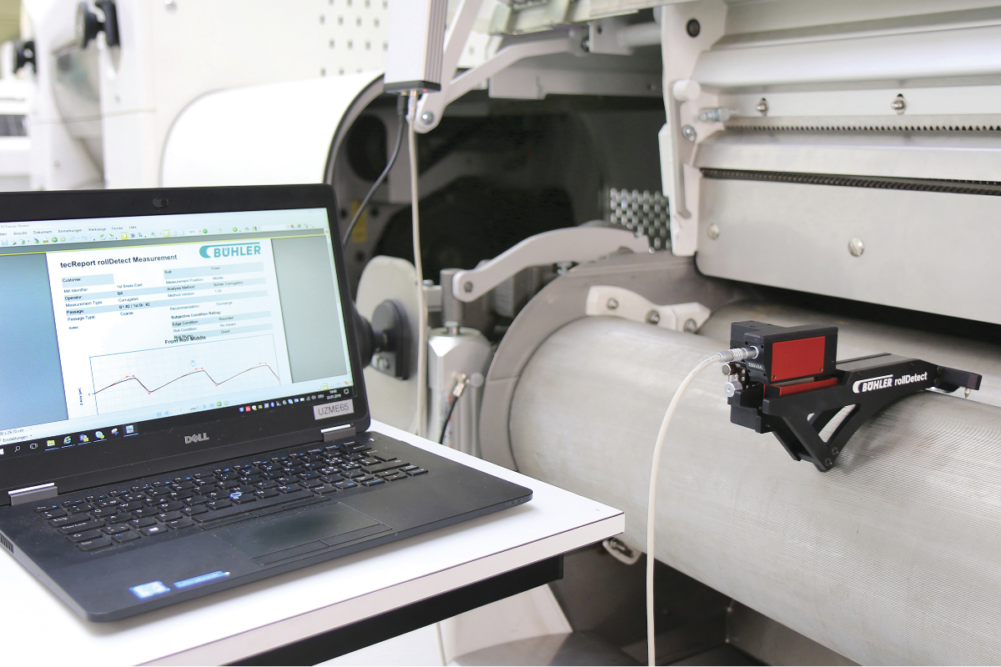
The Swiss company Diavite, in cooperation with Bühler, has developed a portable tactile device for measuring the surface condition of smooth and corrugated rolls.
The rollDetect system has been in use for several years and has proven itself worldwide. It is used in Bühler service stations and also by Bühler specialists on the road for periodically checking the surface roughness of grinding rolls in flour milling, feed milling, and brewing industries.
It consists of a scanning device that can be freely positioned on the rollers and an evaluation unit. The values determined are with great accuracy by means of 15,000 measurements over a 15-millimeter measuring path.
Smooth rollers are measured using a diamond stylus, while corrugated rollers are measured by a needle stylus, showing the effective surface structure of the examined roller. The values are then directly evaluated in a special evaluation device.
The initial result of the evaluation, the tecReport, shows the current condition of the roll graphically as a deviation from the target condition and, in a traffic light system, evaluates the condition of the roll as “green = ok,” “orange = to be observed,” or “red = critical.”
A further function of the software creates the so-called ecoReport for each individual roller which interprets the data determined, and taking into account all factors of economy, determines the optimum time for the inspection of the roller – not too early and not too late, but just at exactly the right moment.
Martial Wüthrich is director of Diavite. He can be contacted at m.wuethrich@diavite.com.


